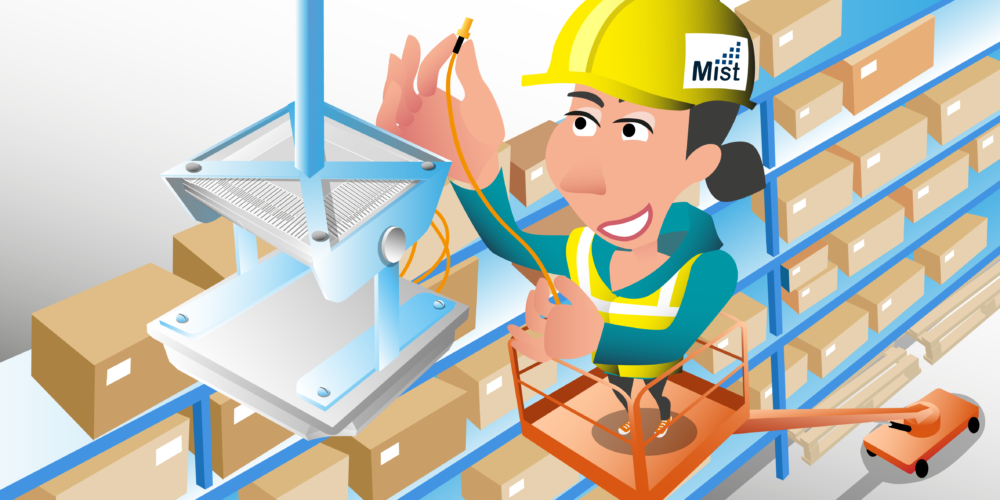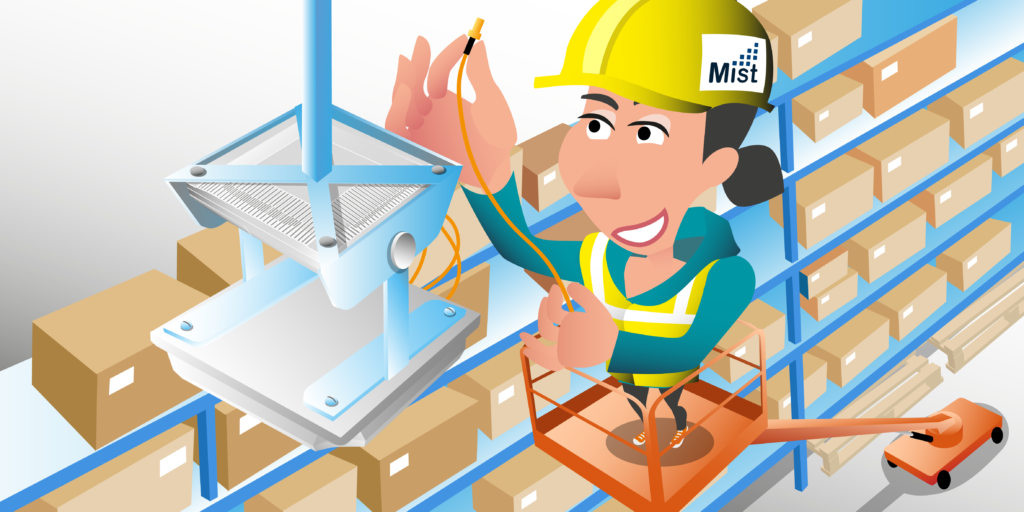
Warehouse Wi-Fi design are among some of the most difficult. We’ve got high ceilings, high racking, variable stock levels, forklift trucks, automation machinery, truck bays, robots, chillers, freezers are among some of the considerations in these often very challenging environments. Now, one of the keys to successful warehouse Wi-Fi design is using the correct equipment installed in the correct location. You see, I’m amazed at the number of times I will see indoor access points, which have been built for an office environment, designed to be mounted no higher than five meters, mounted actually at 14 meters in a warehouse above racking.
You’d also be surprised at the number of times I’ve seen access phones hanging off a wall by their ethernet cable having been knocked by a forklift truck. Here, we see Stanley finding this out a hard way. So when designing for a warehouse environment, let’s use equipment which has been designed for that environment, just as we see Misty doing here. She’s using access point which has external antenna connections and then antenna, which has been specifically designed for warehouse high-rack environments. Warehouse high-rack antennas are available from a number of driven vendors.
Here as some examples. These can all be mounted directly above the high-rack aisle pointing straight down. They have a very narrow beamwidth, about 15 degrees, in one orientation to ensure the signal stays within the aisle, and a very wide beamwidth, about 120 degrees in the overall orientation to ensure that the signal propagates up and down each row. Now, this slide shows examples from Ventex, from AccelTex, and Laird. And one advantage of using these antennas is that because they can be mounted above the high rack and pointing straight down, they’re out the way of any forklift truck operations.
Now, these antennas either come with four or six leads and both can be used with Mist access points. But if you are using the four-lead version, you need to connect this to the Wi-Fi operating radios and you’d need to connect another antenna to the monitor radio connections. This could just be a standard on the antenna as the radio has only being used for monitoring. Now, here you can see the different antenna connections on Mist access points, and it’s worth noting that the AP32E does also have an internal antenna for the monitor radio, as well as the option for an external antenna connection.
So when picking equipment, let’s pick the right equipment for our environment. And another warehouse example would be when picking an access point to install into a walk-in freezer, the Mist AP63 would be the obvious choice here, designed for both outdoor environments as well as extended temperature ranges, and can operate all the way down to minus 40 degrees.
Now, in this video we’re going to look at an example warehouse design for a high-rack area. Now, for this warehouse design example, we’re going to look at just designing a section of a warehouse for which I’ve already imported the building plan. And you can see that this warehouse plan has a high rack area. It also has some truck bay doors towards the top and the bottom of the plan. We have goods-in and goods-out truck bays. Now, this is a fairly large warehouse, it’s only a small section of that warehouse, but this high rack area, if we were to measure the length, I’ve already scaled this plan, so it should be right, we can see that each rack is about 140 meters long.
And the width, each rack is around, about four meters wide. Now, I’ve already assigned attenuation values to the racking and the walls. So let’s go ahead and put an access point on this plan and see what happens. So I’m just going to take a Mist AP32, an AP with integrated antennas, and we’ll just drop it between two of the warehouse racks here. Now, we can see instantly the sort of coverage and the attenuation we’re getting between these racks from where I’ve placed this AP. It’s providing fairly good coverage down the rack and it provides good coverage for either side, but much closer to the AP.
Now, let me just have a quick look at this access point. We can see that the height of this access point is currently set to 2.4 meters. And let’s have a quick look at how we’ve modeled the racking. We can see that I’ve set the rack height to 11 meters. So if the rack goes up 11 meters, what we don’t want is for the AP to be at 2.4 meters. The ceiling height of this warehouse is actually 14 meters, so let’s put its access point on the ceiling. So we’re just going to change the height to 14 meters, and now we get a slightly driven coverage area with the AP at 14 meters high.
Okay, so we can see what it’s covered. Could we start to design our rack area using this AP? Well, let’s have a little bit of a look. We can see that we’ve got my requirements set to neg 67 dBm, which is what I need for my devices that are going to be working to use, so let me place a few more of these access points and let’s see if we can get a design that’s going to work for our rack area here. There we go. Looks like I need maybe another AP here, maybe one here, and I’ve got a few tiny little gray areas I might be able to get rid of by moving a couple of these APs just a little bit up. But now we can see down each aisle, we’ve got fairly good green coverage everywhere.
One of the problems using omnidirectional antennas, although I can create a nice plan here , is that we don’t really control where the signals going. And if we have another look at how I’ve modeled this warehouse rack, and it’s 11 meters tall and we know it’s about four meters wide, and I’ve actually modeled it with what we call attenuation areas. So unlike a wall where I just set one attenuation value, in an attenuation area, I’m going to set a lot per meter. So we can see that I’ve currently got a set to 1.2 dB per meter. So over the four dB of the rack, that’s going to be about 4.8 dB, about five dB lots.
Now, we measured it on site and that’s roughly what we got, but when we measured it, the racks were, I wouldn’t say they were full, they weren’t empty, but they definitely had gaps in the shelving. It wasn’t completely full, probably medium density between the racks. So across the racks we are measuring just under five dB of lots. Obviously, by doing a lot per meter means that these racks are 11 meters high, so if you had an AP on the ceiling, as we do, there’s going to be a lot more [inaudible] as we go diagonally through a rack to the floor.
But what would happen if these racks suddenly filled up, if they received a delivery and they maybe fill these racks with, I don’t know, fridge freezers and washing machines, big metal objects, and maybe instead of being a just under five dB lots through the racks, we were getting about 10? So let’s make that about 2.5 dB per meter, so across the four dB, we’re losing about 10 dB. All of a sudden I’m not meeting my neg 67 dB requirement just because we’ve got driven stock on the shelves. And that’s one of the problems with these omnidirectional antennas, is as my stock changes, my coverage is going to change.
If I just take one up the access points and we look at the coverages for that one access point, we can see now it’s coming up and down the aisle quite well and we get a little bit either side, we’re not getting the same coverage. But what would happen if, as also happens in warehouse, all the shelves empty in a particular area? Let me change my lots again. And of course, the shelves will always have some lots so let’s say when it’s empty, it’s going to be north of 0.5 dB, so over the four meters that’ll be about two dB lots.
Oh, now one AP covers a very large area. So actually, now we run the risk of having more code channel contention. So while I’m sure if we look at all our APs we’ll have really great coverage, in fact, we’re covering all the area around the racking as well now, we’ve got more chance of having interference from our APs. So what we want to do when we’re designing a warehouse environment is we want to pick a AP/antenna combination, which is going to cover just the area we want and not be too affected by stock changes and what’s happening on the racking.
So let me go ahead and I’m just going to delete all these APs. And instead of using a Mist AP with integrated antennas, we’re going to use one with an external, we’re going to use a Mist AP32E. So let me again just select this. I’m going to position it in my racking area, and at the moment this has got an antenna on it, which is a directional antenna. And if we take a look at this antenna, we can see the direction it’s pointing by these antennas, I can actually change the direction of that antenna and it’s currently beaming down an aisle.
Again, let’s take a look at what height we’ve got this AP placed, so it’s probably at 2.4 meters again, so it couldn’t be in the middle of an aisle at that height. So we might want to place it at 14 meters again, or we could drop it down a little bit, potentially, because the aisles are only 11 meters high so we may want to put it at sort of 12 meters. But still, if we put this towards the end of an aisle, we can see that it’s covering quite a lot either side and it’s not reaching the very end of my aisle, is it?
So if I was going to design this environment and light it, I would actually need to have another AP at the other end pointing back down. The problem with this approach is there’s a couple of issues. One of the issues with this approach is we’d have to have two at either end of every aisle. And while that nicely covers the aisle, we’re going to get a lot of potential code channel interference on each aisle either side, it spreads quite a lot either side.
The other issue I’ve potentially got is, could I mount the AP here? There’s no wall here. So if I wanted to mount it on a wall, I would have to come back to the back wall here. I’m actually covering all the aisles either side, and if I came back to this aisle, most of my coverage as well is pointing down this aisle, is actually spreading quite wide. It’s not really, I’m covering what I want but I’m also covering lots of what I don’t want. So it’s probably not the best antenna to pick. So let’s try and look at a better antenna. And this is where we want to start to look at the dedicated high-rack warehouse antennas.
So let me change this AP to use a high-rack antenna. This is an antenna designed for the high-rack areas. It’s also designed to be ceiling mounted, not wall mounted, pointing straight down. It’s very narrow side to side. So we get good coverage up and down the aisle, but it’s very wide, 120 degree, so we can spread down the aisle.
Now, if I place it’s now somewhere around the center, we can see that that antenna gives very good coverage. Now, I think, let me just have a quick look here. Yeah, I’ve still got it. The shelf is completely empty. So as well as covering up and down the aisle, you can see we’re covering, when these shelves are completely empty, a little bit either side but just into the next aisle. We don’t go beyond one aisle either side. If I put this back to my sort of medium full racks, we can see we reduce that even more, but we’ve not changed the coverage massively.
And if I go to a full rack, so on a day when maybe it’s really got lots and lots of stock on it, I’m getting, still, again, very little either side, but the coverage up and down the aisle, where I want it, isn’t really changing. So this seems a much better choice. Let me go back to my medium coverage. I’m not getting these big coverage areas around either aisle, so I’ve just got to make sure that my APs in the aisles either side are on different channels.
And even when we look at our code channel coverage area, which is a gray area, it only spreads two or three areas either side. So I’ve just got to make sure that APs within that area don’t have the same channel as it’s AP. So if I was going to design this whole warehouse with using these antennas, I may want to, say I put in antennas in each aisle, now I probably wouldn’t put them directly next to each other. I’d want to stagger them a bit to get some distance between them. So let’s take a look at doing that. There we go.
So now I could stagger those APs, and you’ll see that I’ve got plenty of distance between access points. It’s nearly 50 meters there between them, but I’m still covering the whole aisle. And we could do a design like this where we just alternate our APs in this design, and it won’t take long just to fill in the whole high-rack area like this. So having placed all my access points in my high-rack area, I’ve now got a nice high-rack primary coverage design at minus 67 dBm.
Now, if I required secondary coverage though in this area, and a few reasons I may require secondary coverage, one for voice grade roaming, not always required in high-rack areas. But the other reason would be for AP redundancy. What if an AP fails? Would I still meet my coverage requirement? We can see that we only have secondary coverage in small areas down each aisle with its current design. So if we wanted to gain secondary coverage, what we’d need to do is start to put two access points down every aisle, which we could do by simply taking another access point and popping it onto… So we had two access points covering each aisle.
And again, just make sure we have a nice gap between our access points, there’s 35 meters between those APs and between APs from one aisle to another, we’ve got about 17 point a nearly 18 dB. That’s plenty of distance. And we could start to place our two APs, and again, just like we’ve offset them with the single design, we’d make sure that we were offsetting APs in each aisle. So our secondary design, but we’ll just make sure, as you can see, our APs are offset as we do that.
And we could carry on placing APs, the additional APs into this design. And until we’ve got a full secondary coverage design as well as primary coverage down every single aisle. Having designed my high-rack area, so I now have very good primary signal strength coverage. I also have good secondary signal strength. I can start to think about the rest of the area around my warehouse. Now, for these open-plan areas, it is possible to use access points with integrated omni antennas providing we can get our access points low enough down.
Now, I’ve already mentioned that my warehouse here has 14 meter-high ceilings And you don’t want to put an access point with a integrated antenna 14 meters on the ceiling. If that is your only option, you’re going to want to use a directional antenna just to control how far the spread of the signal goes. But if we can use walls or even pillars as we see here to be able to drop out, mount our APs to and drop them down, the using integrated antennas is possible.
So one thing that we can do with these pillars is we can put right-angle brackets on so we can still mount the AP pointing down, but we can do it at a much lower height. We can get the AP much lower to our users. So let me just take a AP, I’m going to, it’s AP 32 and I’m going to place it just as if it’s on a right-angle bracket on the side of that little pillar. And if we look at the coverage now for this AP, we can see what the coverage looks like. Now, first of all, let’s look at the height of this AP. Now, I have set the height to seven meters and the reason I’ve done that is because we don’t want it too high, but we also don’t want it too low in a warehouse.
Very often in these open areas, they’re going to stack products and pallets and you always need to ask the warehouse, well, how high could they be? Now, in this warehouse they go up to about five, five and a half meters high. So what we want to do is measure our access points above it enough that we can get coverage down maybe aisles of products stacked on pellets, and it’s a never-changing environment, so we need to make sure our APs are high enough above that to still provide coverage.
Another consideration we’ve got here is the fact that if I’m placing an AP on the edge of this pillar, the pillar itself will affect coverage behind the pillar. Now, my signal will deflect around it, but it’s likely to be an RF shadow behind it, and as I’ve not modeled these pillars yet in my software, I can’t really see that yet. But we’ll look at dealing with that in a moment, but the main thing I’m concerned about is what the coverage in front of it looks like.
Now let me, I’m just going to move it to the pillar here because one thing I am concerned about doing is providing coverage to these truck bays, and in fact through the truck bays into the trucks. So this is my narrow set of pillars. If we measure the distance, we can see that it’s about just under 50 meters from the truck bays. Inside a warehouse, I generally want to place APs about every 200 feet or 60 meters, that’s probably the maximum distance I want between APs. So you can see that between each of these pillars we have about 50 meters, so that’s within my sort of maximum distance.
And we can see that this AP is providing coverage into these truck bays. And to get secondary coverage, I probably want to take another AP and put it on this pillar too. If I look at both of my access points, we can see that I’ve got good coverage into the truck bays by doing that, and if I look at secondary coverage, I’ve even got secondary coverage into these bays as well. You’ll notice that I’ve also got some truck bays here at the top. So I can do a similar thing with these two pillars here. So let’s get a couple of APs there. And now I’ve got nice coverage towards both my truck bays.
One thing I will want to think about is the area in between these. Again, if we’re just using our rule of thumb of having APs about every 200 feet, that’s every about 60 meters, if I measure the distance between these APs at the moment, excuse me, I’ve just moved an AP, I hadn’t selected my measure tool. Let me try that again. We’re actually 100 meters, which is quite a distance. So what I’m probably going to do is use these middle pillars here and we’ll put one AP, one side on one, and one the other side.
Now I’ve got good coverage within my 60 meters to each AP from my access points. So we’ve covered this area at the side, we’ve covered our high rack. The other area left to think about is our area here. You can see that we’ve still got air, we’ve getting some coverage from our rack APs, but we’ve definitely got areas which are failing our coverage. And we’ve not got any of these nice pillars in this area, but we do have a back wall here and you can see these pillars sticking out on the back wall.
So let me measure that sort of distance and see how many APs we’re going to need to cover that area roughly. It’s about 88 meters, so hopefully, if I take, let’s have a look at what happens if I put access points again on right-angle brackets on either side here. Again, we just want to check the sort of distances we’ve got here. That one’s only 25 meters away from the wall, so it’s not a bad distance, and 36 meters. I can do the same thing up at the top here. That’s, again, place a couple of APs into this design.
And we may want to check that that gives us enough secondary coverage in those areas as well, which it seems to, so there we go, very simply, we’ve created a warehouse-based design using a mixture of integrated antenna AP32s, either mounted on a wall lower right-angle brackets or on these pillars on right-angle brackets. And then in the high-rack area, we’ve used the dedicated warehouse antennas connected to AP32s with external antennas, and we’ve got a very robust primary and secondary coverage AP design.
Now, a fully working Wi-Fi network is often critical to warehouse operations and another big consideration in a warehouse environment is the clients. A variety of mobile computing devices are used for warehouse operations. This will be any sort of device, from barcode scanners to voice picking devices, from while it’s printers to forklift vehicle terminals. And understanding how these devices operate and their individual wireless requirements will be critical.
For example, are these devices 2.4 gig only, or can they also support five gig operations? Which channels do they support? And a lot of older barcode scanners will require very little throughput, transmitting very small amounts of data via telnet applications. And if you’re supporting only these older type of devices, you will find that they work just fine with a minus 71 dBm received signal strength. So you could specify that as your primary coverage requirement.
However, modern day warehousing devices are moving towards more Android-based devices, and these devices support the newer Wi-Fi physical layers with higher modulation, and therefore, we would recommend new warehouse designs should meet a minus 67 dBm primary coverage requirement. For warehouse operations which are utilizing voice-over-IP, well, we’d recommend sticking with our recommended voice requirements, so minus 65 dBm primary and minus 67 dBm secondary. And that would provide you with a full voice-grade design.
Now, warehouse devices are often managed by some sort of mobile device management system, and you have configuration profiles which are pushed out to the mobile devices. And Wi-Fi settings will be part of this configuration profile, and they’re going to include settings such as roaming thresholds, power safe settings, [inaudible] at the supported channels, et cetera. So very often as a Wi-Fi designer, we’re going to need to work with the mobile device management team to fine-tune these settings to ensure that our devices and Wi-Fi design are in line with each other.
Thank you for watching this warehouse design video and goodbye for now.

Warehouse Design
| Minimum Primary Signal | -67dBm |
| Minimum Secondary Signal | -70dBm |
| Signal-to-Noise (SNR) | 25dB |
| Frequency | Dedicated 2.4GHz SSID for 2.4GHz only devices Dedicated 5GHz SSID for all 5GHz capable devices |
High Rack Antenna Recommendations:
For high rack environments consider using high rack warehouse antennas. Examples shown below:
AccelTex ATS-OP-245-8
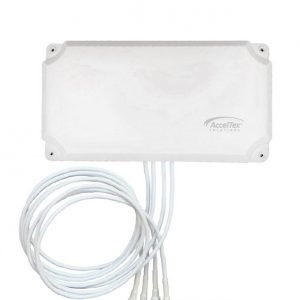
Gain: 8 dBi
Horizontal Beamwidth: 125° / 114°
Vertical Beamwidth: 35° / 24°
More details
Laird PDQ24518-MI1
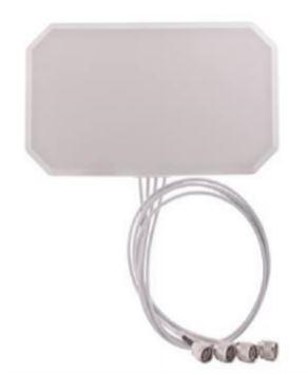
Gain: 8 dBi
Horizontal Beamwidth: 90° / 120°
Vertical Beamwidth: 45° / 30°
More details
AP63 for Freezers
For extending temperature ranges use Mist AP63
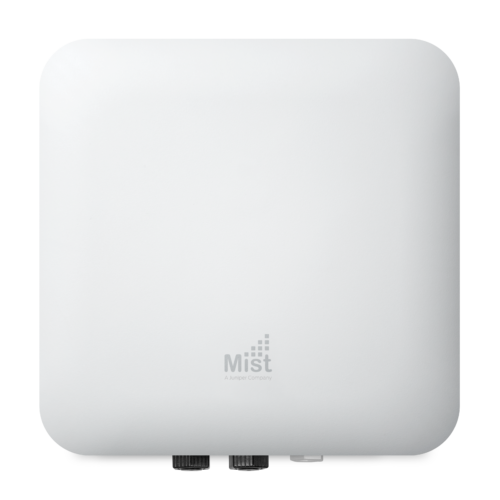
Operation temperature:
-40° to 55° C with solar loading
-40° to 65° C without solar loading
Enclosure:
IP67 / NEMA 4 compliant
Next Videos


